hamstermonitor
DIY Realtime hamster monitoring using Arduino and Grafana
Ever so often you stumble on a can-be-done-in-a-day (CBDIAD) Arduino project that is both simple and rewarding. This is one of those. ![]()
The overall idea was to measure the hamster wheel to answer the question on everyones minds:
But… how far does the he run each night?
What you need
- A
 with a wheel
 - A network connected computer, or cloud, our RPi for the backend services
- Arduino microcontroller with internet access
- A small strip masking tape (or whatever tape you might have)
- A vibration/shock sensor module
- A breadboard
- Some small steel wire, or similar
- Power supply (Warning! Make sure you feed 3.3 V to the ESP-01)
In this setup I used:
-
Poppe and his wheel
- My everyday laptop (running ubuntu)
- 1 ESP8266 microcontroller (ESP-01) + Breadboard adapter for the ESP-01 (mine came with this)
- 1 KY-002 Shock sensor module
- A breadboard
- 1 small piece of masking tape
- 1 10(ish) cm long piece of small steel wire
- A Velleman VMA 440 USB to serial adapter (set to 3.3 V)
- …and a rubber band
Total cost (excluding laptop, hamster, hamster accessories (wheel) and power supply): Approx 8€, but this very much depends on where you buy the Arduino components.
Setup
Part 1: Assemble the Arduino components
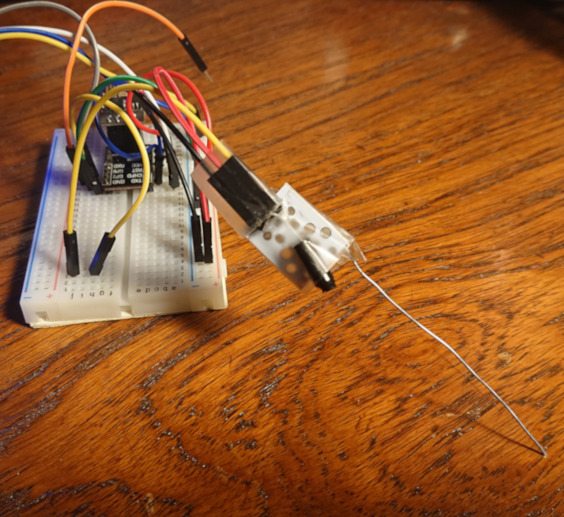
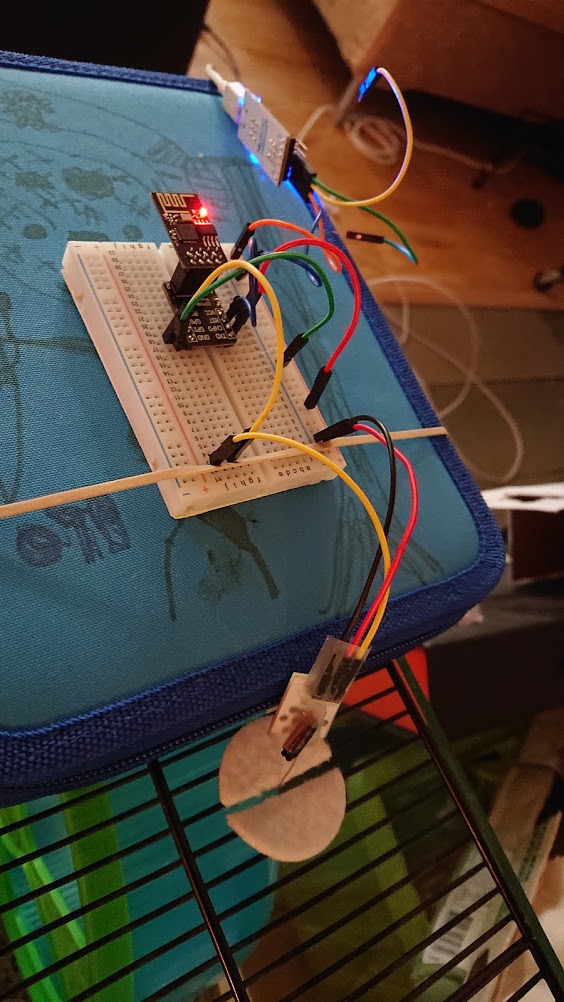
Wire the ESP-01 according to photo below (it’s the shock sensor sticking down into the hamster cage, next picture shows it better).
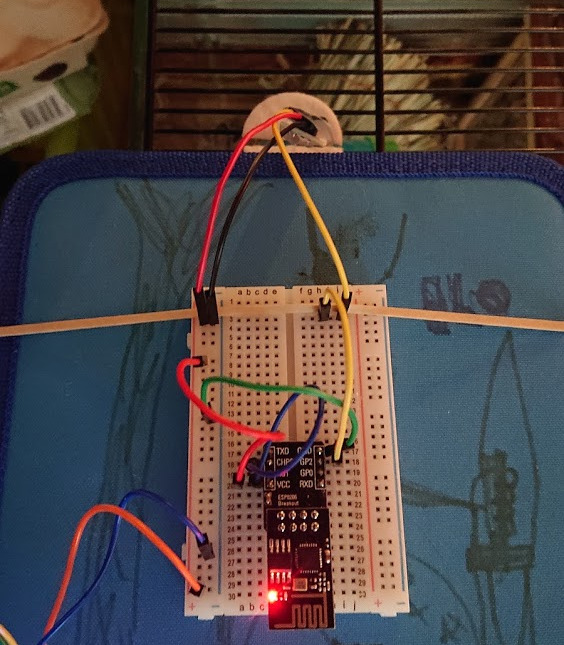
The metal wire is attached to the shock sensor with a piece of tape. This allowed me to slip it down into the hamster cage without risking to accidentally electrocute the hamster.
Part 2: Start the backend services
Start the backend services using the provided docker compose file.
git clone git@github.com:oversizedhat/hamstermonitor.git
cd hamstermonitor
cd server
docker-compose up
Naturally this is just for testing purposes… when you take your hamster monitoring to production it’s a whole different ballgame ![]()
Part 3: Connecting the pieces (upload the sketch)
The sketch is hardcoded with wifi settings matching my home network which need to be changed…
- In main.ino change network name and ip adress of server to match your network.
const char* ssid = "YOUR_WIFI_NAME"; const char* host = "YOUR_SERVER_IP_ADRESS"; - Next to main.ino, create a file named secrets.ino and add you local wifi password in it like this:
#define WIFI_PASSWORD "YOUR_WIFI_PASSWORD" - In order to upload your updated sketch you need to make a few additional wirings between the ESP-01 and the serial adapter (or Arduino if you are using it).
- Connect RXD with TXD
- Connect TXD with RXD
- Add a wire between GP0 and GRN (this will force the ESP-01 to start in bootloader mode)
- Power off/on to start in bootlader mode
- Upload sketch from IDE (I use VSCode with Arduino extension)
- Set Baud Rate to 9600 in the IDE
- When done and verified you can remove these wires.
Open the Serial Monitor, power off/on and it should give you some response:
8�������%�Ready

Connecting to YOUR_NETWORK_NAME
..
WiFi connected
IP address:
THE_ALLOCATED_LOCAL_IP_ADDRESS_OF_ESP01
The test “run”
Slap on the piece of tape on the wheel, make sure it can spin nicely without touching the ground.
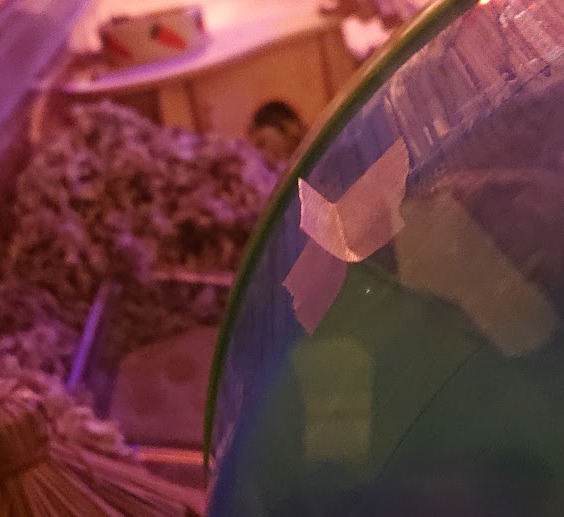
Fine tune the positioning of the piece of metal meeting the tape. You want to make sure the metal and tape touch each lap, just enough to register vibration without adding resistance. To make sure the wheel was fixed in place I screwed it onto a wooden board…
Time to test it out a bit…
- Open the Grafana Dashboard: http://localhost:3000 (admin:admin)
- Find the dashboard most elegantly named “Poppe Dashboard” unless you renamed it to match your hamster…
- Chances are you now need to wake up and motivate your hamster to go for a run. If you dont want to wake up the hamster you can spin the wheel a couple of times and observe the dashboard for changes, note the 5 sec delay between each refresh.
Here is my test run.. such a glorious moment it was:
Results
From a few days of collecting metrics I noticed some trends:
- Poppe does pretty much all his running from the moment we leave the living room for bed (he is hiding up until then). I.e. he starts around 22:45-23:15.
- Poppe likes to run in at least two sessions, the first one longer (1-1 1/2 hours) and a second shorter one (under 20 min). In between he has a short break. Possibly a leg stretcher. All in all he seems pretty focused running early in the night.
- His lap times seem very consistent around 1-1.2 seconds per lap, maybe with a slight decrease of pace during his second session.
Out of the measured 5 nights his record was a whopping 4019 meters(!).
4019 meters in one night!
Sadly I accidentally deleted the data to prove that but here are some screenshots of the metrics![]()
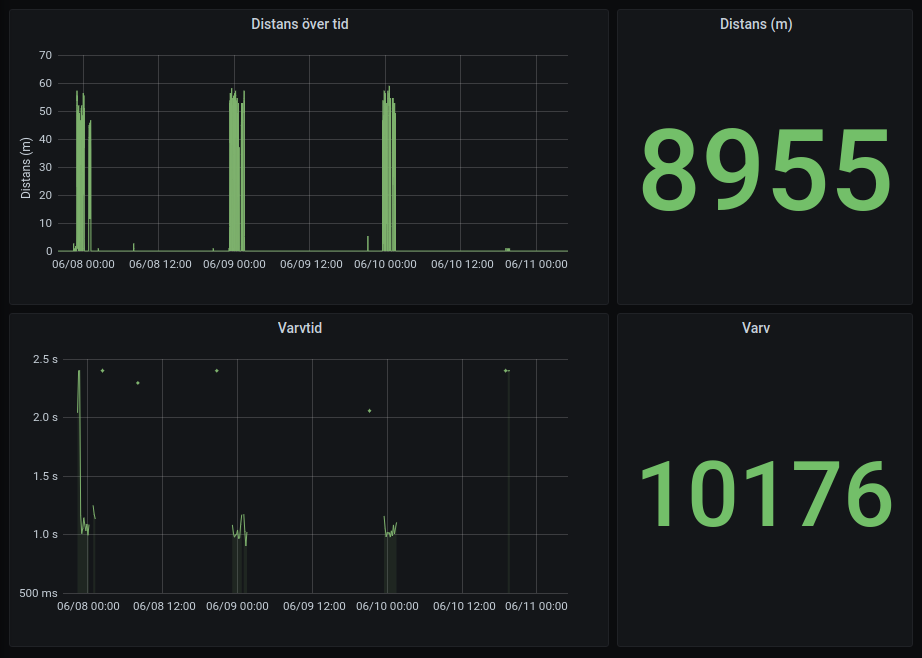
Poppe 3 nights of running:
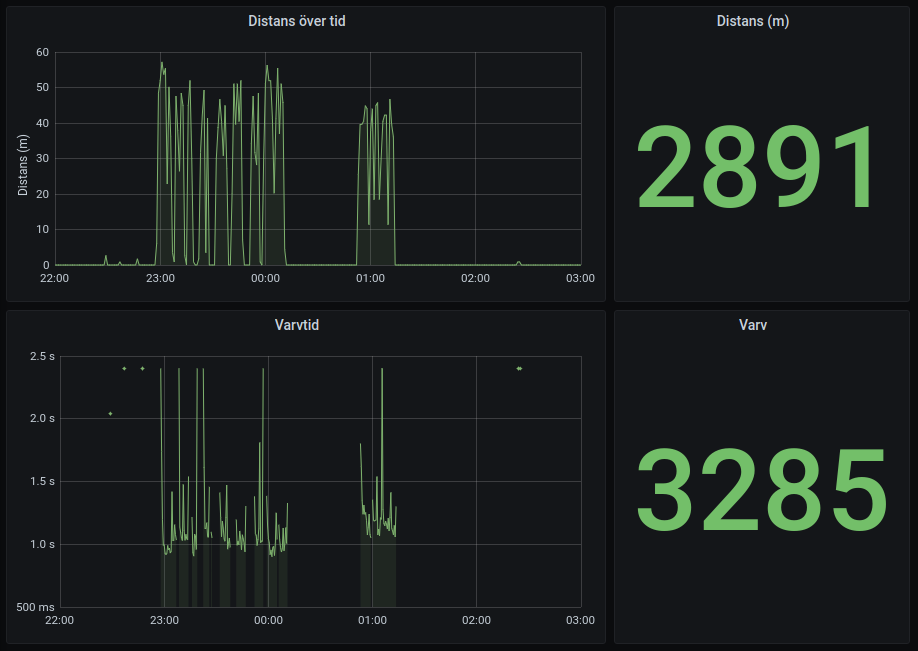
 One nights running divided into two sessions, the second with slightly higher average lap time:
So I had tons of useful ideas where to go from here but as usual when something is working, interest fade quickly…
If you do something fun, don’t hesitate to reach out to me at: oscar@oversizedhat.com
Some of the mistakes I made
- Using my regular laptop for the server I needed to make sure wifi was not turned off during the night, which is the default power saving setting for Ubuntu at least. In Ubuntu this can be done by disabling powersaving (2) editing config file: /etc/NetworkManager/conf.d/default-wifi-powersave-on.conf
[connection] wifi.powersave = 2 - Make sure your local IP adress is static. This can most likely be done in your router admin page for your network. Mine wasn’t static which meant that when I turned on/off my computer the IP was changed and as the IP was hardcoded into the Arduino sketch the 8266 lost its ability to connect. Naturally I assumed the issue was something completely different and easily wasted an hour or two trying to figure out why it was suddenly broken…

- As usual when it comes to myself and Arduino about 80% of the time spent seem to go into the black hole of seemingly random issues. With the ESP8266 I think many of them have somehow been power related and Google usually helps.
A final notes on the ESP8266
The ESP8266 ESP-01 is a super neat little module with microcontroller capabilites, i.e. you can upload your Arduino sketches straight to instead of having to use an Arduino board. It also has a couple of general purpose pins. One thing to make note of is that it’s easy to burn these with wrong voltage (needs to be 3.3 V). A tip is to order a couple of them in one batch so you don’t have to be so careful…